Guidelines For Installing Lead-Lined Drywall
Lead-lined drywall, also called lead-backed gypsum board, is a crucial material for radiation shielding in hospitals, laboratories, research facilities, and industrial spaces. It provides an effective barrier against harmful radiation, ensuring the safety of personnel and compliance with industry regulations. However, because lead is a heavy and hazardous material, installing lead-lined drywall requires specific tools, techniques, and safety precautions. This guide explains the entire process, covering the materials needed, safety measures, installation steps, and compliance requirements in both Canada and the United States.
Why Use Lead-Lined Drywall?
Radiation Protection: Lead effectively blocks radiation from X-rays, gamma rays, and other ionizing radiation sources, making it essential in medical and industrial settings.
Seamless Integration: Lead-backed drywall installs similarly to regular gypsum board, allowing for straightforward construction with enhanced protection.
Regulatory Compliance: Many industries require radiation shielding to meet health and safety regulations, including standards set by the Canadian Nuclear Safety Commission (CNSC) and the U.S. Nuclear Regulatory Commission (NRC). Lead-lined drywall ensures compliance with these standards.
Durability & Longevity: Properly installed lead-lined drywall offers long-term protection with minimal maintenance.
Tools & Materials Needed
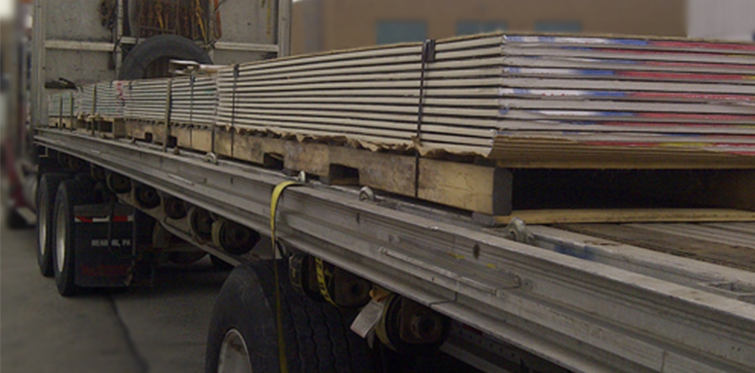
- Lead-lined drywall sheets (specified thickness based on shielding requirements)
- Lead batten strips (for sealing joints and preventing radiation leaks)
- Drywall screws (sized appropriately for the weight of lead-lined drywall)
- Lead caps for screw heads
- Protective gear (gloves, goggles, dust mask, and protective clothing to prevent lead exposure)
- Measuring tape, utility knife, level, and pencil for accurate cuts and alignment
- Drywall saw and power drill for precise cutting and installation
- Joint compound for sealing seams and fasteners
- Wood or metal framing (chosen based on structural requirements and building codes)
- Radiation shielding verification tools (if required for testing compliance)
- HEPA vacuum or wet cleaning supplies for proper lead dust cleanup
Installation Steps
1. Preparation
- Assess the area where the lead-lined drywall will be installed and confirm the required lead thickness based on radiation safety guidelines.
- Inspect and reinforce the wall framing, as lead-lined drywall is significantly heavier than standard drywall and requires additional support.
- Ensure all materials meet the necessary shielding specifications and are free from defects before starting the installation.
- Clearly mark installation areas and coordinate with electricians and plumbers to prevent unnecessary modifications after the drywall is installed.
- Install battened lead strips to the framing before the drywall is installed. These strips will overlap with the drywall sheets, ensuring a continuous radiation shield.
2. Handling & Safety
- Lead is a hazardous material, so proper handling procedures must be followed at all times.
- Wear protective gear, including gloves and a dust mask, to minimize exposure to lead dust and particles.
- Store drywall sheets flat in a clean and dry area to prevent warping or damage before installation.
- Avoid unnecessary cutting or bending of lead-lined drywall, as damaged sections may compromise the effectiveness of the shielding.
- Implement a designated lead waste disposal plan in accordance with local environmental regulations in both Canada and the U.S.
3. Cutting & Fitting
- Measure and mark the drywall according to the required dimensions, ensuring proper coverage of the shielded area.
- Use a utility knife or drywall saw to cut the gypsum board carefully, minimizing lead dust and debris.
- Keep the lead backing fully intact at the edges, as any gaps or exposed edges could create weak points in the radiation shielding.
- If penetrations (e.g., for electrical outlets or plumbing) are required, ensure that lead shielding is applied around these areas to maintain complete protection.
- Use lead sleeves to cover any cutouts where radiation leaks could occur.
4. Securing the Drywall
- Before placing the first sheet, install battened lead strips to the framing. These strips will be behind the drywall, covering the seams when the installation is complete.
- Position the first drywall sheet against the wall framing with the gypsum surface facing inward.
- Fasten the drywall securely using drywall screws, spaced accordingly to accommodate the weight of the lead-lined drywall.
- Cover each screw head with a lead cap before applying joint compound to maintain the continuity of the radiation shielding.
- Install additional sheets, ensuring the battened lead strips remain behind the drywall, fully covering the joints for seamless protection.
- Stagger seams where possible for additional strength and shielding effectiveness.
5. Sealing & Finishing
- Spread joint compound over seams and lead caps to create a smooth surface while preserving the shielding effectiveness.
- Sand the finished surface lightly to prepare it for painting or further finishing, ensuring the lead lining remains undisturbed.
- If multiple layers of drywall are required for higher levels of shielding, repeat the process while ensuring that all layers remain securely fastened and properly sealed.
- Conduct a thorough cleanup using HEPA vacuums or wet-wiping methods to remove any residual lead dust from the work area.
Compliance & Inspection
- Once installation is complete, compare the work against the original shielding design and ensure it meets all required specifications.
- Schedule an inspection with a qualified Radiation Safety Officer (RSO) or an industry-certified professional to verify compliance.
- If local regulations require testing, conduct radiation leakage tests using specialized detection equipment to confirm the effectiveness of the shielding.
- Keep records of installation details, inspection results, and compliance documentation for future reference.
Ensure compliance with:
Canada: Canadian Nuclear Safety Commission (CNSC), Health Canada regulations, and provincial building codes.
United States: Nuclear Regulatory Commission (NRC), National Council on Radiation Protection & Measurements (NCRP), and local state regulations.
Conclusion
Proper installation of lead-lined drywall is critical for maintaining effective radiation shielding and ensuring the safety of workers and occupants in shielded environments. By following these best practices, contractors, facility managers, and builders can create a secure, radiation-proof space that meets industry regulations.
For expert guidance and high-quality radiation shielding solutions, inclusing lead lined drywall contact Ultraray today!